It’s common practice for Professional Organizers to advise their clients to use their vertical spaces. Oftentimes, rooms are so jam packed with furniture and your 4 walls are like, hey…look up here…there’s all this great space! Take a picture of each of your walls and really see how much space is being underutilized.
Now, close your eyes and think of the magnetic surfaces in your home, like appliances, file cabinets and bathroom cabinets. You use their interiors for food, files and toiletries respectively, but what about their exteriors? Aha! They offer vertical spaces too! Remember learning your alphabet with those magnetic block letters and using your refrigerator as a surface for organizing words or to document your trips with
fun magnets? Bingo!
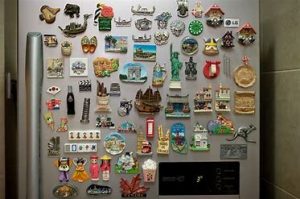
No, I’m not going to tell you to use those spaces. Besides, anyone with a Stainless-Steel refrigerator knows that they can’t use the front. Plus, I don’t want them to get cluttered up!
I first became intrigued by the idea of using metal surfaces for storage from a product named Grundtal (oh, those names!) from Ikea. It is a set of three magnetic spice tins. Designed to show what’s inside with a clear top, I thought of all the things that they could store aside from spices. There are the paper clips for your office, beads for crafters, and nails for your tool area.
So sure, there are magnet boards that you can buy to put such items on, but how about getting creative and creating one of your own! Try some of these other applications to get your stuff off surfaces and up on the wall!
Metal Serving Trays – Head to flea markets and garage sales, even thrift stores to look for these. To know for sure that they are magnetic, simply keep a small magnet in your pocket or purse and test it out. Spray paint your treasure in a color that you love and hang it up! Another idea is to frame the tray and use a colorful scrapbooking paper on the surface or wrap the tray taut in fabric!
Baking Sheets – I know what you are thinking…baking sheets are aluminum and not magnetic. True, however, with a coat of magnetic paint, it instantly becomes a magnet board! You take a regular cookie sheet, coat it with magnetic paint (available in a spray can) and it instantly becomes a magnet board!
Disclaimer: I have not tried the magnetic paint spray, so I’m not sure if it works. Reviews are mixed as to its magnetizing success.
The possibilities are endless with ideas of how to use these items for storage. Try them in:
…Your Entryway – using some magnetic caddies in various sizes for your sunglasses, your wallet, and a magnetic hook for your keys.
…Your Kitchen – using a small magnetic caddy for pens and note paper, invitations to parties (think one board for each family member) and of course for the above-mentioned spices in the Grundtal containers.
…Your Office – for inspirational pictures and quotes, your to do list, and small office supplies again in the Grundtal containers or ones like it.
…Your Bathroom – Listen up ladies! Look on Pinterest and use the search term “magnetic makeup organizers” and you’ll see a booming trend of using trays to hold makeup items vertical…genius! Glue those small disc magnets (from your local craft store) onto the back of products like powders, blushes and eyeshadows. For items like mascara, eyeliner and brushes, attach a small magnetic cup and store them there.
There is a myriad of other possibilities. Where would this work for you in your home?

We’ve all read books and articles about how to organize. I’ve even written many articles on what to do first, what to do second, etc. However, I’ve never written about what not to do. It seems counter-intuitive to write about anything negative, but sometimes we need to discuss this aspect about de-cluttering and organizing as well.
1. Don’t buy any organizing products until you see you what you actually need. You won’t know the answer to that until you finish de-cluttering and putting like with like to figure out the size of the product/container and where it’s going to go. Why waste your time buying something, not needing it, and then having to return it? You also have to remember where you put the receipt so you can return it and either exchange it for something that will work or just return it because you don’t need it.
2. Shop in your own home or office. Once you’ve finished de-cluttering and organizing, you will likely have something empty that will work to contain the items you have decided to keep. Think of the money you could save by using something you already own.
3. Stay in one area. Don’t jump from one space to another. If you do that, you’ll have spent hours all over your house or office and not get anything done. Let’s say you want to organize your living room and you find a hairbrush in that room. You take the hairbrush to the bathroom where it should live, and next, you start working on organizing your bathroom. Then, you find something that belongs in the bedroom, so you move to the bedroom. What’s the result? You’ve now been in 3 different rooms for the past several hours and haven’t gotten anything done in any of the areas. In this example, stay in the living room. If you see that something belongs in another room, put the item in a place near where that room is.
4. Don’t bite off more than you can chew. If you only have an hour, don’t tackle your 2-car garage. You may be able to work in a small area in the garage, but if you think you can get everything done in this small window of time, you may get discouraged and not want to continue when you have more time. Remember the SMART goals – specific, measurable, achievable, realistic, and timely.
5. Remove donated items and trash right away. You’ll be amazed at how you will feel and how much room you have when these items leave your home or office. It’s almost like a breath of fresh air. And, if you put them in your car to go somewhere, deliver as soon as possible so your car doesn’t become cluttered.
OK, folks…it’s August. Any day now, the mail will arrive with teacher assignments and the excitement (and anxiety) of the new school year will start to bubble up!
While the kids won’t go back to school for a few more weeks, we all know the
planning for the FDOS (“First Day Of School”) starts much sooner, behind the scenes… The work done here will set you (and your kids) up for a successful transition from summer to school! Check out my Do’s & Don’ts…they save me the first day headaches…every year!

The relaxed bedtime routine during the summer can be a FDOS killer! One small adjustment, each day, in the week or two leading up to the start of school can ensure success. Start rolling back their bedtime by 15-minutes each night. Continue until you reach your desired school year bedtime. Later, when it’s time to get up at 6:30am, they are already adjusted. Bodies and brains are ready to go, move, learn!
Don’t sit on those must complete school and medical forms. Save yourself the 11th hour scramble…If your kids require ongoing medical monitoring (think daily meds or allergy related epi-pens), contact your school nurse at least 3-4 weeks prior to the start of school. There will be forms that need to be filled out by your physician before the start of school.
Summer clothes rule on the first day of school. Look back through your FDOS pics…most likely shorts, skirts, dresses, tanks and tees…I only buy a few things and then buy clothes when they do need them, closer to October. Give yourself a break and put Fall shopping on the back burner for now.
Create a homework station. Quiet, calm, comfortable and consistent is what you want. Pick up some extra supplies for your kids’ homework station…items you might not have around the house. For my twins, I purchased extra protractors, rulers and a dictionary. I knew that they would need them at home as well as school. Bonus: it eliminates the, “I left my protractor at school” excuse. Set them up for homework success with a “homework caddy”. Stock it with pencils, glue sticks, crayons, rulers and anything else they may need to get their homework done. I also make a color coded file for each of them that stays at the homework-station. When they come home, they put any important papers, that need to be reviewed, in their folder. Everything they need….is within reach.
School makes kids hungry! And they need good fuel to keep their bodies and minds moving. Give them easy access to healthy snacks (for lunches and after school) by prepping your pantry. I prefer to use clear bins so they can see what’s inside and they can grab and go. The clear bins make also make it easy for me to see what’s inside so I know when to restock. I can also see what they are eating and what they aren’t.
Take some time to enjoy the last days of summer leading into the first day of school. Plan ahead and save time, every day, for good quality family time. Remember that all of the emotions that you are feeling….the stress, excitement, anxiety, fear….well, your kids are feeling that too! Make your home and the days leading up to school a safe, calm, comfortable space to quell the Back To School nerves. Talk to your kids about how they’re feeling, spend quality time and enjoy each others company before the craziness begins!
Need more inspiration? Want to see these tips & more in action, at my own home? Click the link below for a sneak peek video into this professional organizer’s back to school setup:
We are in the midst of a heatwave here in Eastern PA. Today for example is 97°, with a feels like temp of 106°…ouch! Not the most conducive weather for organizing, right?
Well, definitely don’t work in the garage, or the attic…basically avoid anyplace that isn’t close to air conditioning or where heat rises. That still leaves some great spaces throughout your home to work in. However, before you even start, grab some ice-cold water or your favorite cold beverage and sit down to write out some to- do lists.
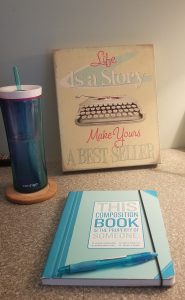
Nothing fancy, a spiral bound notebook from your child that still had useable pages in it will do; you know that they’ll want something brand new for the next school year anyway! I bought myself a fun notebook from TJ Maxx (see picture), in my favorite color, to make it less of a chore.
Prefer an app for your to-do lists? Trello is a fantastic app which lets you create endless topics (lists) and tasks (cards).
Start by writing the name of each room in your home on a separate page. The great thing about these lists is that they can be a summer and beyond project…no need to rush it! Next, start your brain dump, where you can write tasks to be done in each room. Write down what comes to mind and add more as you think of it. The tasks should be specific and therefore hopefully less overwhelming. It’s up to you to choose how many tasks you want to complete at a time!
For example:
Master Bedroom Closet Tops
Do you have other things come to mind, that aren’t specific to a room? Write them down too! Getting too much junk mail? Look to catalogchoice.org and optoutprescreen.com. Getting too many spam calls? Try an phone app like, Should I answer?, with a cute little octopus icon, which turns green for a positive call or red, to know instantly if a call has received negative ratings, and block them on your phone! I know, I know, once a company is blocked by using one number, they will move to another, but every little block counts!
Pen and paper or app, the key to dissolving a cluttered mind is to write things down, so that you have space in your brain for more important things to think about, like what flavor of ice cream to get tonight!
As a residential professional organizer, I visit lots of homes. One household system that is quick to fall apart and overwhelm a person is LAUNDRY.
I have strong opinions on laundry:
• dark and light clothing should be separated (my children do not all agree)
• “laundry” is not done until it is all put away
You don’t have to share those views, but I see on a weekly basis how the “putting away” is where the system breaks down. Most of us are pretty good starting the laundry process. There is an obvious and inevitable external motivation to wash clothes when one runs out of clean socks or underwear. Many people are also decent at shifting the wet clothes over to the dryer. The widespread access to timers on our phones has made this step particularly easy for even the “follow-through-challenged.”
I see “laundry overwhelm” during the next 2 points in the system:
1) clean but not yet folded clothes that remain clean…until they get mixed with dirty clothes or buried under other stuff
2) folded clothes in baskets — when not returned to dresser drawers or closets they clog bedrooms and hallways and hold laundry baskets hostage creating a problem for dirty clothes who remain “homeless”
If we focus on these 2 connected steps along the process: 1) folding and 2) putting away and employ task batching, the process goes smoother.
Task batching is a way to manage time and perform tasks in sets where the same mental effort and physical energy is used to maximize productivity and streamline a process.
Even if laundry is not the most stressful task, any project you can simplify will free up your mind for the heavy lifting of life. If you’re a procrastinator, my suggestion to task batch your folding and put away steps is good news! It decreases the distance between start and finish and builds in lots of manageable size “loads.” More, but smaller tasks to quickly complete, offer the satisfaction of a job well done!
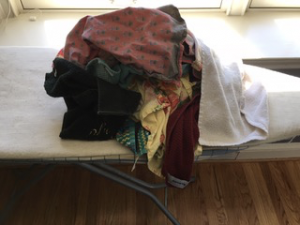
Take this example of table linens – out of the dryer and onto a folding surface.
Task Batched Folding Steps would look like this:
• Sort clean laundry into categories: if you mix loads from a whole household, your first sort job will be by person, then by category of clothing (socks, underwear, shirts that fold, shirts that hang, bottoms, work out clothing, pajamas…etc).
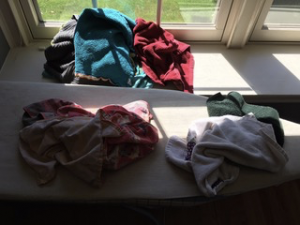
Step 1: sort into categories: this load broke down into hand towels, dish towels and cloth napkins.
• Prep each category so it’s ready to be folded (right any clothes that are inside out or button collars).
• Fold each category separately – meaning one category at a time – preferably on a clean and flat surface.
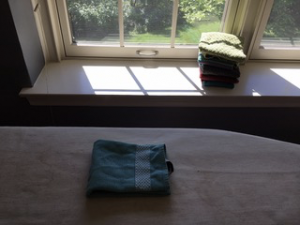
• Do all of your folding at once.
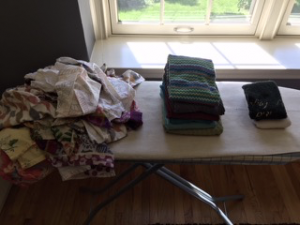
Step 2: fold each mini pile as its own category.
Our cloth napkins need to be ironed so they’ll stay on the ironing board.
The other 2 folded piles will go into their appropriate drawers in the kitchen.
Will task batching your folding process solve all of your laundry dilemma’s? No — but folding by category allows you to delegate small pieces of the project to even the youngest helpers and lets others take pride in the smooth running of the household if you’re lucky enough to live with people who will “volunteer” or as in our household, be volunteered to help 🙂
“Where did all this stuff come from anyway? How did it all fit in here in the first place? I can’t believe how long this is taking and how many boxes we have! AAAaahhhh!!!!”
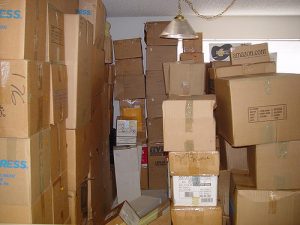
Well, it’s true. When we pull everything out of its storage space, we can see the volume of what we really have. And, for those things that haven’t been seen or touched in years: much of it is astonishing.
“Cans of hairspray? Wait. I haven’t bought hairspray in a can in at least 2…uh, 5…oh, I don’t know – better throw that out. How did these shoes get back here? Man, they’re dusty. And sort of misshapen. Well, okay very misshapen. Nevermind. Out! And, wait. Do we really have 6 new containers of black pepper? Six? I had no idea. This will last us forever!”
You are moving into a new home. Whether larger or smaller than your last, it’s an opportunity to get organized – right from the start! Here are 6 spaces to set up when you move in so you can get and stay organized:
Spice Storage: There are so many options for organizing spices that there is really no reason you need to fight to find what you need, have bottles and jars falling out onto you as you reach behind, or repurchase multiples of what you already have. 
Pantry: DIY or go the extra mile and get pro-installation. A pantry organizing system will be a delight to your family today and a great selling point tomorrow.
Under Sinks: Either in the kitchen or bathrooms, under sink storage will make ALL the difference. Enjoy the control and say goodbye to yucky under-sink messes!
Shoes: The struggle is real. First decide where you want to store them (By the entryway? In a closet? Under the bed? In the garage?) Then, reign them in.
Bedroom Closets: If you are renting a home, you may want to save money and purchase some temporary solutions that you can take with you when you move out. For homeowners, installing built-ins is the way to go.
Storage Area: Before you go building columns and walls of heavy boxes stacked one atop another; stop and think. This is what got you into the last mess of storage chaos. Is there room for some shelving? Is there ceiling or wall space to be taken advantage of?